
An invoice is a document that is sent to a customer to request payment for the services or products that have been provided. It is important to include all of the necessary information on an invoice so the customer can understand what they are being charged for and how to make their payment.
In this blog post, we’ll discuss how to write an invoice and provide some tips on how to make it as accurate and professional as possible.
What Is an Invoice?
An invoice is a bill for the goods or services that have been provided. It should include all of the relevant information about the transaction, such as the date, description of the goods or services, and the total amount due.
The invoice should also include your contact information and any instructions on how the customer can make their payment.
Why Is It Important to Write an Invoice?
An accurate and professional invoice serves several purposes. First, it helps you keep track of what has been sold and what is still owed. Second, it provides a record of the sale in case there are any disputes later on. Finally, it gives the customer all of the information they need to make their payment promptly.
Two Types of Invoices
There are two main types of invoices:
- Service Invoice. This type of invoice is for businesses that provide services, such as consulting, web design, or landscaping. It should include a description of the services provided, the date they were performed, and the total amount due.
- Product Invoice. This type of invoice is for businesses that sell physical goods. It should include a description of the products sold, the quantity, the unit price, and the total amount due.
What to Include in an Invoice: Must-Haves
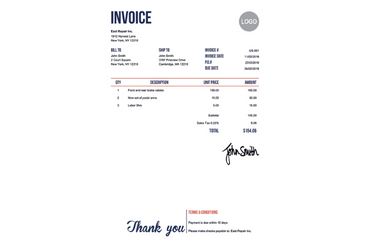
When creating an invoice, there are a few key pieces of information that should be included:
- The date the invoice was created
- The name and contact information of the business or individual who is sending the invoice
- The name and contact information of the customer or client who is receiving the invoice
- A detailed description of the work done or products provided
- The total amount due
- The date of payment or the payment terms and payment method
- Any relevant invoice number or reference numbers
Nice to Haves
While you don’t need to include these, they can be a nice touch or add additional value or convenience to your customer.
Consider including:
- A logo or other branding for the business
- A payment portal link so the customer can easily pay online
- A thank you or another friendly message
Now that we’ve gone over what should be included, let’s talk about how to make an invoice template.
What to Consider When Choosing Acceptable Payment Terms
The payment terms you include on your invoice should be clear and concise. You should also consider how soon you need to be paid.
Some common payment terms are:
- Due on receipt: This means the customer needs to pay the full amount as soon as they receive the invoice.
- Net 30: The customer has 30 days to pay the invoice in full.
- Partial payments: The customer can make partial payments over time, but the invoiced must be paid in full by a certain date.
Invoice Template: How to Format Your Invoice
Formatting an invoice template will serve you well. It’s something you can make once and use again and again. It creates brand consistency and looks professional. There’s no one “right” way to format your invoice, just pick a style and stick with it.
When you’re ready to format your invoice, decide how you want it to look.
- Do you want it to be one page or two?
- What color(s) will you use?
- What size and font will you use for the text?
- How will you arrange the sections?
- Where will you place your logo?
Once you have a clear vision for how you want your invoice to look, it’ll be much easier to format it the way you want.
If you need help with the design, there are plenty of free online tools and resources. Canva is a great option for creating professional designs with no experience required.
Making an Invoice Template in Word or Excel
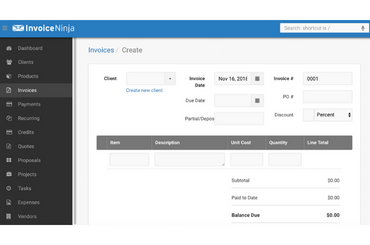
Many different software programs and mobile apps can be used to create invoices, but Microsoft Word and Excel are two of the most popular options.
How To Make an Invoice in Word
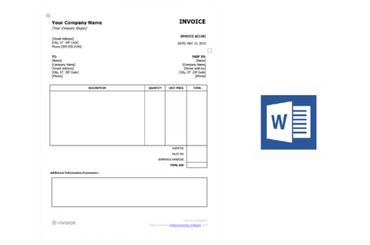
Open a new document in Word and add your business name and contact information at the top of the page. After that, you’ll want to add the date, invoice number, and customer information.
Then start adding line items. Include a description of the work done or product sold, the quantity, unit price, and total amount due for each line item. If you have any additional charges or discounts, include those as well.
Once you have all of the line items added, calculate the total.
How to Make an Invoice in Excel
Open a new workbook in Excel and add your business name and contact information at the top of the page. After that, add the date, invoice number, and customer information.
Then start adding line items. Include a description of the work done or product sold, the quantity, unit price, and total amount due for each line item. If you have any additional charges or discounts, include those as well.
Then, calculate the total.
You can also find Excel and Word templates pre-made to work from.
Sitting Down and Writing the Invoice
Now that we’ve gone over what you should include in your invoice and how to format it, let’s talk about how to write it.
When writing your invoice, there are a few things you’ll want to keep in mind:
- Use simple, clear language
- Be as specific as possible
- Avoid using industry jargon, and be concise
- Double-check your work for errors
Take your time when writing the invoice and be as detailed as possible. If you need to, break down the charges by individual items, products, or services provided. This will help your customer understand exactly what they’re being charged for.
By following these simple tips, you can be sure that your invoice will be easy to understand and free of any mistakes.
Start Using WorkWave Service Software!
Sending the Invoice
The final step is to send the invoice to your customer. This can be done electronically via email or through invoicing software. If you’re sending it electronically, include a clear subject line and any instructions on how to make payment.
You can also send invoices via snail mail if that’s your preference. If you go this route, include a self-addressed stamped envelope so the customer can easily return the payment to you.
Or, you could fax your invoice if that’s your customer’s preference.
No matter how you send it, just include all the necessary information and give your customer clear instructions on how to make payment.
When to Send The Invoice
You should send your invoice as soon as the work is completed or the product has been delivered. The sooner you send it, the sooner you’ll get paid.
If you’re sending an invoice for work that will be done over a longer period of time, like a retainer, you can send it at the beginning of each month or after each completed project.
Ensuring You Receive Payment on Your Invoice

Now that you know how to write an invoice, it’s important to ensure that you receive payment.
The first step is to be clear about your payment terms. When creating the invoice, add the date of payment or the terms of payment. This will help avoid any confusion later on.
It’s also important to follow up with your customer after you send the invoice. A simple email or phone call can go a long way in reminding them to make a payment.
It may be hard to believe, but 60 percent of invoices are paid late. If you don’t receive a payment within a reasonable amount of time, don’t be afraid to reach out again and remind them of your outstanding invoice.
If you have an issue with a customer paying invoices late you or not playing can talk to a lawyer about your options or pursue mediation.
Customers who have repeat problems paying invoices on time may become an issue. If you incur too many losses because of the late payments, you may want to reconsider working with them.
Tips for Making Professional Invoices
Now that we’ve gone over how to write an invoice, let’s talk about some general tips for making invoices as accurate and professional as possible.
- Use a computer or laptop to create and send your invoices. This will help ensure that they’re free of any mistakes and look more professional.
- If you have a physical store, include your store address and hours on the invoice.
- Include your logo on the invoice if you have one. This will help create brand recognition and make your business look more professional.
- Use a consistent font and color scheme throughout the invoice. This will help create a cohesive look and feel for the document.
- Sign each invoice before sending it out. This adds a personal touch and shows that you’re a professional business.
By following these simple tips, you can find a logical, natural system for sending invoices that will be easy to carry out consistently as you grow your business.
Final Thoughts
When you write an invoice, remember to include all the necessary information, format it in a way that makes sense for your business, and use clear language throughout. If you do all of those things, you’ll be well on your way to creating accurate and professional invoices.


